
New Player Guide
English
- April 28, 2025
- Princeps.6481
Guide
Introduction to fractals
Fractals of The Mists, frequently called "fractals", or simply "fracs", are 5-man repeatable endgame dungeon-like instances with a large scale of difficulty and rewards. 100 levels are structured into 4 different tiers, each consisting of 25 levels.
As you move up in fractal level, the content becomes more difficult – but also more rewarding.
You can find the portal entrance to fractals in Fort Marriner in Lion's Arch. There are no gear requirements for tier 1 fractals, allowing anybody to try fractals out.
Starting at level 20, players need to deal with Agony which requires increasing amounts of Agony Resistance to counter effectively as you move up in fractal level. Without enough Agony Resistance you lose a percentage of your HP every second while under the effect of Agony. Click on the Agony icon to learn more about the scaling of the damage by Agony.
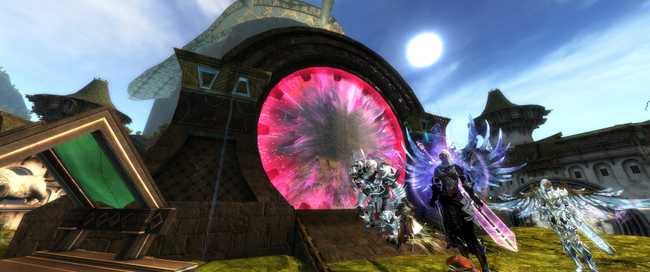
Starting with tier 2, the players begin encountering Mistlock instabilities which add another mechanic to play around, and therefore another layer of difficulty. By tier 4, each fractal will apply multiple Mistlock instabilities. A complete list of Mistlock instabilities and countermeasures can be found at the bottom of this page.
Defiance bars
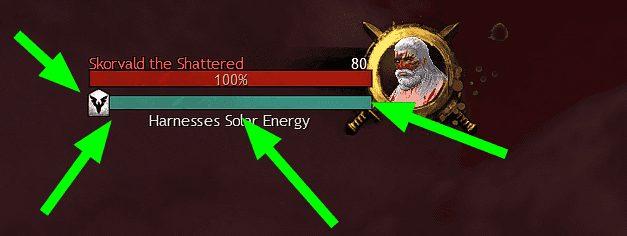
Have you noticed the blue bar under the boss' HP bar? Whenever you use a Crowd Control skill (a skill that throws the enemy around, stuns, or applies movement impairing conditions) a chunk of the bar gets removed. The bar is called a defiance bar or more commonly in pugs a break bar. When the entire bar is broken the boss gets the Exposed debuff which increases the incoming damage to the boss for power damage by 10% and 20% for condition damage. This is one of the most important mechanics across all fractals as this allows you to deal huge amounts of damage in a short time. The idea is to always break the defiance bar and then burst. Ideally, everyone in the team contributes to breaking the bar as it appears.
Skills that damage the defiance bar are highlighted turquoise in the tooltip. Bosses have varying sizes of CC bars. Commonly, champions have a bar of the size
600, while bosses in CM-fractals range around 2000. However, it is important to note that the tooltips are incorrect for many skills (list of all missing or dead). Often, the displayed numbers are off by a large margin and therefore do not even serve as a rough estimate. We suggest instead consulting the wiki for finding out the exact values.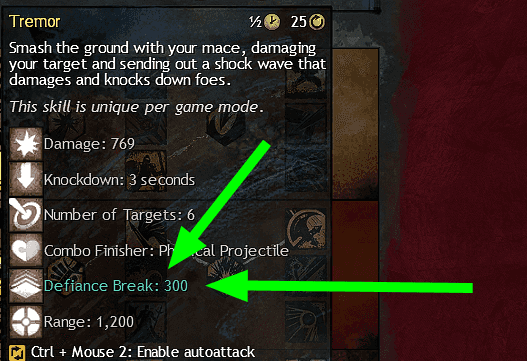
Using Crowd Control effectively is the key to success in almost all fractals! A fast break will decrease kill times by a large margin even if your party underperforms in every other aspect!
Read more about breaking Defiance bars here: CC-distribution examples!
Read more about breaking Defiance bars here: CC-distribution examples!
Differences between fractals and raids/strikes
There are quite a few differences that set fractals apart from other PvE content in Guild Wars 2. Most prominently is the length of a single level: One level is usually completed in 5-10 minutes. The levels do not only contain bosses but also other encounters such as small puzzles or fighting mobs. These puzzles give insight into different mechanics that usually come to play during the boss fight. Many levels can be sped up by thinking outside the box and using smart tricks.
The fractal-specific potions influence the way builds are designed. Each of them grant 1.5 times of your Agony Resistance in a specific stat. This allows builds to be played a lot more offensive compared to elsewhere. Our builds are optimized for multiple amounts of Agony Resistance since you will acquire more than 162 Agony Resistance over the course of your fractal journey due to Mist Attunement 1 and higher augmentations.
| Potion | Stat | Gain on 162 Agony Resistance |
|---|---|---|
| Vitality | 243 Vitality = 2430 Health | |
| Toughness | 243 Toughness | |
| Concentration | 243 Concentration = 16.2% Boon Duration |
These potions are invaluable and later on starting at T3 or T4 highly recommended to use as the fractals get harder. Hover over the items to read about the other effects of each potion. Keep in mind, that each large potion grants you five stacks.
Navigating the Discretize website
The Discretize website has three main categories of guides: General builds and fractals. For new players, all categories should be equally relevant.
- General: Learn more about the mechanics you encounter in fractals and how to deal with them.
- Builds: A collection of builds, which work reasonably well. Please note that the builds are incomplete due to missing contributors. The quality of the build pages is of utmost importance to us; we'd rather have fewer builds but higher quality ones, than listing only rudimentary information about all possible builds. Most build pages also contain variations. For example, there is no dedicated page for DPS Condi Specter, as it is played almost the same as the Alacrity version.
- Fractals: An overview of each fractal including possible skips and shortcuts. Also mentions what kind of utility should be brought to mitigate damage at specific encounters.
Fractal Masteries
| Name | Points | Description |
|---|---|---|
| Follows Advice | 1 | Unlocks daily rewards for fractals and additional vendors in the fractal lobby. |
| Agony Channeler | 2 | Allows attuning rings. Fractal potions grant a 10% stat bonus (see above). |
| Recursive Resourcing | 3 | Increases the rewards by a large margin. Fractal potions now grant a 25% stat bonus. |
| Mistlock Singularities | 5 | Unlocks Mistlock Singularities for +5 Agony Resistance. Fractal potions now grant a 30% stat bonus. |
Tiers and Expectations
Fractals are designed to gradually introduce you to the game mode and mechanics in a relatively unpunished way in tiers 1 and 2, but become increasingly difficult and demanding on your party by tiers 3 and 4. Because of this increase in difficulty in the later tiers, the focus on team play starts to make a larger impact in every encounter. Without adapting to the difficulty scale and focusing on how an individual can best serve the party and encounter, groups may fail an encounter repeatedly or simply fall apart.
There tends to be a gap that starts to appear around T3, leading to the "T3 phenomenon"; a tier with more demand on the players meeting with players who are unaware or unwilling to adapt their build or play to meet that demand. This demand and disparity only increase in T4, making the focus on both team play and individual adaptation highly important to clear any encounter and continue improving as a player.
A key part of this adaptation includes using an appropriate build, with traits and gear stats that fit your role in the group. While gear, traits, and builds will not matter much in your first adventures in fractals, they will make a large difference in later tiers. It is advised to get a rough overview of building effective team compositions as it will increase the success rate.
While there are no hard-set rules or things you "must" bring to clear an encounter, finding the best way your character can strengthen and serve the group as you learn can help make fractals more enjoyable and satisfying to play for both yourself and your party.
| Tier | max. required Agony Resistance | Instabilities | Description |
|---|---|---|---|
| 1 | 17 | 0 | This tier is meant as an introduction to fractals. Mechanics and incoming damage are very forgiving. Group DPS requirements are low. The only recommendation is to have at least full exotic gear. |
| 2 | 61 | 1 | Tier 2 fractals should be played in a full party of 5. The mechanics hit slightly harder, and bosses and mobs have increased health, requiring more DPS to effectively clear. The party begins to encounter mistlock instabilities and Agony. |
| 3 | 106 | 2 | Tier 3 fractals introduce 2 mistlock instabilities at once, while also increasing the damage from mobs and the number of mechanics. The mechanics are less forgiving, and the group will need higher DPS to effectively clear. When starting in tier 3 fractals you are expected to have some knowledge about your class and how fractals work. You will no doubt start learning more advanced tactics and how to adapt to more demanding encounters here, preparing you for T4. |
| 4 | 150 | 3 | When running tier 4 fractals you should be confident with both your class and the mechanics of the fractal. T4 groups will expect you to play your part and adapt to help the group however possible. Key boons become a requirement to effectively clear the content. Running with optimal utility and food as well as fractal potions (, , ) is expected. |
Trouble finding groups? Looking for training runs?
![[FotM] [FotM]](/static/e2a31ad31e17e010435f265353d6c491/a6d36/mistlocked.png)
Mistlocked [FotM] is a Guild & Discord Server focused on teaching new members of the Guild Wars 2 community the various aspects of Fractals of the Mist! The guild offers a wide range of fractal training sessions across both NA and EU, covering everything from Tier 1-4 to Challenge Modes (CMs). For experienced CM players, Mistlocked also provides no-heal fractal training, with opportunities for promotion and progression based on log submissions.
All information is available on their discord.

Guild Wars 2 University is a discord-server-based community that focuses on helping and guiding new and returning players to learn everything that Guild Wars 2 has to offer. GWU provides a friendly and judgment-free environment where veterans from all areas of the game help teach and train anyone interested in learning.
For more information, check out their Discord
External tools
Players use several tools/add-ons to analyze gameplay more efficiently. Here is a list of common tools:
- arcdps: DPS meter. Almost everybody uses it, no one has gotten banned for using it.
- log manager: helps you organize your logs, which can be optionally recorded by arc DPS.
- gw2wingman: compare your performance against the averages of the community
- Fractal farming by [fast]: find out which fractals are best to farm; which daily fractals reward the most
- Killproof.me: Website for sharing your killproof for raids/fractals/strikes.
Acquiring gear to counter Agony
Gearing your first character can be expensive, especially for fractals, which will eventually require a full set of ascended gear to gain enough Agony Resistance for most people. This is partly why it is recommended to start gearing a build with usable stats from the beginning, as it will serve you on your entire fractal journey.
For beginners, it is recommended to socket only in infusion slots of ascended gear since they are the most efficient ones to use and the builds on this website are optimized for having all 18 infusion slots occupied with to reach 162 Agony Resistance. In case you are tight on money you can also slot and upgrade them later by extracting them with . keep in mind that each extraction will cost 24 silver.
For a temporary 15 Agony Resistance buff, you can buy a and skip ahead of the suggested table below. We suggest acquiring most of the gear in fractals, however, you of course can buy your gear in WvW or open world or any other place.
Tier 1: max 17 Agony Resistance
Requirement: Full exotic gear
Optional: Level Chef to 400 (costs about 2.76g, check gw2crafts.net), craft which enables a fast track to Tier 2 fractals. Since Tier 1 and 2 are essentially identically in difficulty it is recommended to go that route, however, you will need to exchange the backpiece very soon.
Homework:
- Start working towards the accessories that you can buy with guild commendations or - if you have a lot of spare laurels - buy them for laurels. Keep in mind you need 30 laurels later for crafting your ascended armor.
- Save up relics to buy ascended rings (5 days of T1 fractal dailies are required)
- Alternatively, buy Living World Season 3 Episode 3: A Crack in the ice and farm for trinkets (or any other living story maps: Bloodstone fen, Dragonfall). The fastest way is to farm both Bitterfrost Frontier and Dragonfall.
- Craft or buy an equivalent via laurels (if your build uses base game stats)
Tier 2: max 61 Agony Resistance
Acquire on your journey in T2:
- 18 Agony Resistance: Two ascended accessories of your build of choice. Example: and .
- 36 Agony Resistance: By attuning ascended rings. Example: and
- 9 Agony Resistance: Getting a back item such as:
Homework:
- Start leveling the profession for your armor class (Armorsmith, Leatherwork, Tailor) to 500. Use gw2crafts.net for the cheapest leveling.
Tier 3: max 106 Agony Resistance
Acquire on your journey in T3:
- You need 5 more to fit the maximum requirement of 106 Agony Resistance.
- Suggestion: craft 4 ascended armor pieces and hope to get a to upgrade one of your rings to
- Alternatively, do strike missions and open the weekly chest for a chance of receiving an ascended armor box.
Homework:
- Start leveling the profession that can craft your desired weapons to 500. Use gw2crafts.net for the cheapest leveling.
Tier 4: max 150 Agony Resistance
Wrapping up:
- Finish your ascended armor
- Infuse your remaining ring(s)
- Craft ascended weapons (easy way: Caladbolg alternatively profession weapons from Path of Fire)
- Infuse your backpack (and/or begin working towards )
- Upgrade - if necessary - to
Congratulations! Now you should have exactly 162 Agony Resistance and match the gear in our builds page.
Abbreviations for navigating the LFG
General
These are common abbrevations, used when a group only needs a general idea of a player (e.g., we are missing a quickness healer) or when they have specific experience expectations.
| Short | Long | Aliases | Description |
|---|---|---|---|
alac | Alacrity Provider | alacdps, alacheal | Any build that can provide Alacrity. Could be a support or damage build, but it might be specified (e.g., alacheal) |
quick | Quickness Provider | qheal, qdps | Any build that can provide Quickness. Could be a support or damage build, but it might be specified (e.g., quickdps) |
cdps | Condition DPS | dps, CDPS | A suitable condition dps build from a class of your choice. These offer strong condition/ticking damage |
pdps | Power DPS | dps, PDPS | A suitable power dps build from a class of your choice. These offer strong burst damage |
p&f | Potion and Food | pof, p & f | You are expected both to use all three fractal potions and build-specific food buffs |
DwD | Dances with Demons | title, 98 title | Earned by completing level 98 in challenge mode with no one in your group being defeated |
NA | Nightmare Aspect | 99 title | Earned by completing level 99 in challenge mode with no one in your group being defeated |
KE | Kryptis Exorcist | 100 title | Earned by completing level 100 in challenge mode with no one in your group being defeated |
UFE | Kill proof | kp | : Only gained from CMs. Requirement in LFG, can be shown through killproof.me |
Usage of /gg
You can use the chat command
/gg within fractals to immediately kill your character (dead, not downed). This is used generously in fractals and serves as a tool to reset to a checkpoint together or avoid unnecessary areas of content.It is a useful tool in fractal skips, as it allows the entire party to teleport to a checkpoint once one player activates it.
It can also serve as a full skill reset in key moments. If everyone in the party is dead at the same time, cooldowns will reset for all players. Therefore it is advised for the entire group to use
/gg at certain key positions to reset long cooldowns, like between Siax (2nd boss) and Ensolyss (3rd boss) in Nightmare CM. Never resurrect as long as another player is still alive. If another player tells you /gg, they are probably doing a skip that you are unaware of or they simply weren't ready for combat yet. Either way, avoid wasting time questioning it, just /gg and reset.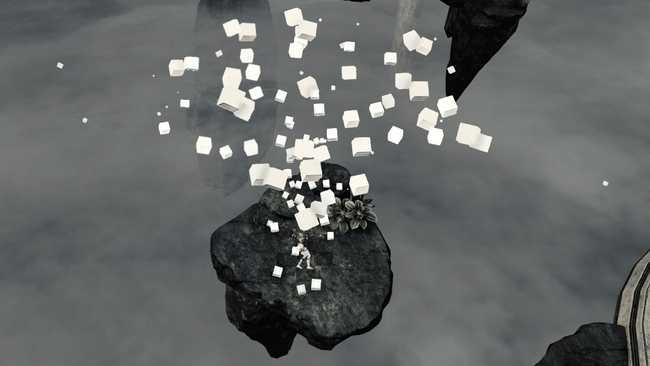
Pre-stacking at Mistlock Singularity
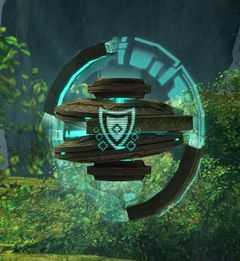
After maxing the fractal masteries to level 4 you get access to Mistlock Singularities. Taking one of these will reset the cooldowns of all your skills! This allows you to precast certain skills before entering the battle without a penalty. It makes sense to precast Quickness, Alacrity and use blast finishers on certain Combo Fields.
The most common applications are Might-stacking using blast finishers inside a Fire Field (3 stacks for 20 seconds with boon duration) and Stealth-stacking inside a Smoke Field (3 seconds).
Do not use other combo fields than fire on the Mistlock Singularity! All combo fields but the Fire Field are useless in terms of prebooning.
You can find out which skills are Combo Fields and Combo Finishers by hovering over the skill and reading the tooltip. Hover over the following skills: is a Fire Field and a Blast Finisher.
Below is a list of frequently used blast finishers among all professions. Note that it is often required to swap to different weapons, make sure to swap back before you enter combat.
Below is a list of frequently used blast finishers among all professions. Note that it is often required to swap to different weapons, make sure to swap back before you enter combat.
Might stacking for groups using blast finishers in a fire field.
- Revenant: (Staff 4)
- Guardian: (Focus 5), (Staff 2),
- Mesmer: Use (Torch 4), (Spear 5).
- Soulbeast: Take the trait and use to make boons last longer, use (Warhorn 5)
Fire fields Might stacking
Below is a list of commonly used Fire Field skills. Make sure that everyone is back on their main weapon set before starting a fight.
Line of Sight (LoS) and stacking
In many Fractals, the concept of "Line of Sight" or LoS can be applied to pack mobs together without using any skills that Pull. As soon as a player takes aggro of a mob it tries to attack the player. In doing so it needs to find a valid path. For enemies with melee weapons this means it will run right towards you, ranged enemies need a clear sight towards the player without obstruction. After taking aggro of a mob the player wants to move behind a wall so the mob loses Line of Sight and is forced to take the shortest path to the player.
Generally, you always want to stick together as a group. The reason is that boons and unique buffs won't reach players that are standing too far away. Since most classes deal high damage in melee the logical conclusion is to stack up, pull mobs together either with Pulls or Line of Sight, and burst them down as quickly as possible. Even if the amount of enemies seems dangerous at the first glance the most secure position on the map is in the center of the stack!
Pulling mobs by using Line of Sight
Mistlock Instabilities
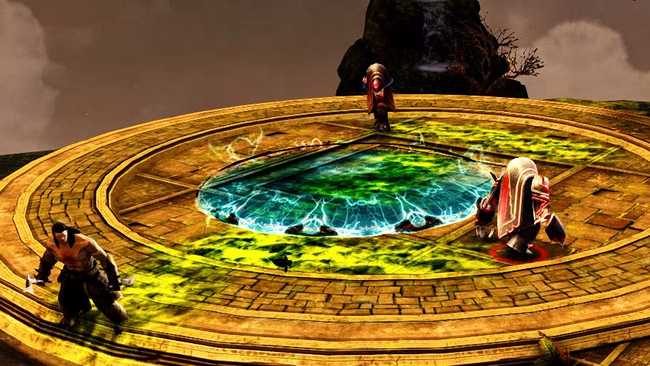
In tiers 2 to 4, the fractal will always have Mistlock Instabilities active, which add additional mechanics to the fights. The selection is random for each difficulty level and changes daily. More information can be found on the official wiki.
Below is a list of all current instabilities and their possible countermeasures.
| Mistlock Instability: Adrenaline Rush | When enraged, enemies deal 100% increased damage while they're low on health (below 10%). Enemies deal 10% less damage when not enraged. |
| Mistlock Instability: Afflicted | Outgoing Resistance and Resolution duration is increased by 33%. Enemies apply random conditions (Bleeding, Burning, Confusion, Poisoned and Torment). Not necessary, although a good countermeasure is to have the Firebrand use or blasting light fields. |
| Mistlock Instability: Boon Overload | Each boon on a player reduces their maximum health by 1.5%. Outgoing boon duration is increased by 20%. |
| Mistlock Instability: Flux Bomb | This means that players in combat are randomly marked with Flux Bombs which leave a damaging and blinding AoE field behind. Do not place those inside the combat area, learn to dash away right before the field deploys. If you keep walking forward while marked you won't get any damage from the bomb. Flux bombs now apply to both allies and enemies. It is a little DPS increase to deploy it under the boss/mobs but it is not worth it blinding your team members! |
| Mistlock Instability: Fractal Vindicators | Fractal Avengers are replaced by hard-hitting Fractal Vindicators. Those need to be killed as fast as possible to prevent further chaos. Unlike Avengers, the only way to remove aa Vindicator is to kill it. |
| Mistlock Instability: Frailty | Players are smaller and take 10% more damage, but they move 25% faster. |
| Mistlock Instability: Hamstrung | The lower your health, the slower you move capped at 33% slower. Endurance regenerates 33% faster. Heal yourself to reduce Hamstrung stacks! |
| Mistlock Instability: Last Laugh | Enemies explode upon death if not stunned. Each enemy killed explodes within a 180 radius 1.75 seconds after its death, dealing high damage and applying Daze to foes around it. Recognizable by a yellow zone after a mob's death. Stunned enemies apply Protection and Stability to nearby players. |
| Mistlock Instability: Mists Convergence | Causes a set of effects from other fractals to spawn, including The Mossman, a deadly Champion Rabbit, Veteran Jade Maw Tentacles, an airstrike from the PvP map Skyhammer and the cannon assault from Captain Mai Trin Fractal. |
| Mistlock Instability: No Pain, No Gain | Enemies receive Protection, Resolution and Might when you hit them, with a 20 second internal cooldown per enemy. Anything that strips boons can be helpful here. For example, Renegade can strip with ( or ), Condi Specter can strip with . Mesmer can strip with or Sword auto-attacks. Stripping an enemy boon will also apply the boons to nearby allies. |
| Mistlock Instability: Outflanked | Allies within 300 range take 100% damage when attacked from behind. Non-boss enemies within a range of 300 take 100% damage when attacked from behind or the side. |
| Mistlock Instability: Social Awkwardness | Players will be pushed away from one another. Make sure to not run around like a headless chicken! Find a good spot and stand still. If you have Stability you will not be affected. |
| Mistlock Instability: Stick Together | Take 25% increased damage when not within a range of 300 of an ally. Deal 5% more damage when within a range of 300 of an ally. |
| Mistlock Instability: Sugar Rush | Increases player movement speed and attack speed by 15%. Elite and lower enemies' movement speed and attack speed increase by 25%, but their critical chance is reduced by 25%.. |
| Mistlock Instability: Toxic Sickness | Players are occasionally affected by the toxic vomit attack out of the Nightmare Fractal. Every player gets a cone AoE in front of him, aiming at a party member will deal lethal damage, conditions and the debilitated effect. Proper stacking and positioning nullify this instability effectively. When the vomit attack hits an enemy it applies the Poisoned, Torment, Confusion and debilitated conditions. In fractals, debilitated decreases outgoing damage by 10% per stack, up to 30% |
| Mistlock Instability: Toxic Trail | Enemies leave a trail of poison behind them which inflicts direct damage and the Poisoned condition. Blocking a toxic-trail attack will absorb it, cleanse the condition and apply Poisoned to nearby enemies. It can be very dangerous when fighting multiple mobs. Removes Aegis. This is currently bugged and does not apply Poisoned to enemies. |
| Mistlock Instability: Vengeance | When enemies die, they enhance nearby foes with multiple boons, it does not apply to elite foes. Strip any enemy boon to inflict them with Weakness . This is currently bugged and if you lose Aegis it will apply Weakness to the player. |
Key findings
- Don't use your heal skill while under the effect of Agony.
- CC the boss first, then use your burst skills. Everyone has to contribute!
- Only use Fire Fields on the Mistlock Singularity during pre-stacking.
- Always stack together, boons are shared nearby.
- Don't be afraid to communicate with your team if you are new. People will help you out!
Trouble finding groups?
![[FotM] [FotM]](/static/e2a31ad31e17e010435f265353d6c491/a6d36/mistlocked.png)
Mistlocked [FotM] is a Guild & Discord Server focused on teaching new members of the Guild Wars 2 community the various aspects of Fractals of the Mist! The guild offers a wide range of fractal training sessions across both NA and EU, covering everything from Tier 1-4 to Challenge Modes (CMs). For experienced CM players, Mistlocked also provides no-heal fractal training, with opportunities for promotion and progression based on log submissions.
All information is available on their discord.

Guild Wars 2 University is a discord-server-based community that focuses on helping and guiding new and returning players to learn everything that Guild Wars 2 has to offer. GWU provides a friendly and judgment-free environment where veterans from all areas of the game help teach and train anyone interested in learning.
For more information, check out their Discord
If you are one of those that seek to improve beyond clearing fractals for the loot we highly encourage you to find a static via our
#looking-for-static channel on our discord or apply to Discretize. We encourage the fractal community to strive for self-improvement and help in any possible way on our discord server or in-game.